Showing posts with label tutorial. Show all posts

Sunday, July 31, 2011

Stash buster: Adjustable pen holder for journals

I am old school. No blackberry. No palm pilot. I'm still using paper planners and journals. Usually there is a pen crammed inside which eventually falls into the bottom of my purse.

I finally figured out a stash buster that solves that problem and makes use of those narrow strips that are too hard to throw away. It is a little pocket which attaches to a journal with an adjustable elastic cord.

Personally, I think stash busters should NOT be time busters, so this is a simple and quick project :)

Materials (for a 1" x 6" pen holder for books 6-10" in height):
Note: quilting cottons should be used for ease of turning

main fabric: 2-1/4" by 6-1/2"
lining: 2-1/4" by 7" (2 pieces)
elastic cord: 12"
shank button: 1


Hem one side of the main fabric by pressing 1/8-1/4" twice.


Knot one end of the elastic cord 1/2" from the end (helps cord to not slip out) and place on the right side of the lining #1.


Sandwich main fabric (right side out) between lining #1 and lining#2 (right sides of lining facing together) and pin in place. Make sure elastic cord is straight and parallel to the long side. Starting from the bottom right edge (the shorter end) sew around with a 1/4" seam (avoid the elastic cord!) leaving an opening at the bottom end.


Snip the corners and turn inside out. Press out top corners until square.


Turn bottom edge under 3/8" and sew opening close and top stitch all around.


At the free end of the elastic cord, make a slip knot (pull the cord end through the loop so it will be adjustable).


Sew button through the main fabric only (you can add the button before sewing the opening close).

All done!

This can be easily resized for highlighters, reading glasses, and etc.

Thursday, September 24, 2009

Tutorial: Drawstring bags with french seams

I'm having so much fun making these, I wrote up a simple tutorial. It's a simple and practical project, useful as a lunch or knitting bag. My favorite feature are the french seams throughout -- absolutely no fraying during machine washing!!

Materials needed:
* Note: using upholstery weight fabric and stiff cording helps the bag to stand on its own

Upper fabric (cotton): 2 pieces 13 1/2" x 8"
Denim bottom: 1 piece 13 1/2 x 9"
Cotton cording/twill tape: 1 yard


1) Going against most sewing instructions, with wrong sides together, sew the upper fabric with the denim (on the long side). Use a very narrow seam allowance (around 1/8" to 1/4")


2) Trim seam to 1/8"


3) Open and fold with the right sides are together. Press and sew with a 3/8" seam, making sure the previous seam is fully enclosed.


4) One french seam completed. Repeat with the other upper fabric and the other denim side. You should have one long strip with the denim in the middle. Fold in half lengthwise with the wrong sides together and stitch (with a 1/8" to 1/4" seam) starting 2" from the top. Trim seam to 1/8" and press. Sorry for the lack of photos -- I forgot :)


5) At the side opening (created by the 2" opening), fold 1/8" twice toward the wrong side. This forms an opening for the drawstring. Pin, stitch and press. Repeat with the other side.


6) With right sides together, starting at the bottom point of the opening, sew a 3/8" seam capturing the previous seam. Repeat with the other side.


7) At a bottom corner, pull fabric until the side seam and bottom "seam" meet. Sew perpendicular to the side seam, 1 1/2" from the triangle tip. Repeat at the other corner. This creates a flat bottom.


8) At the top of the bag, fold 1/4" and then 1/2" to create a casing for the cording. Pin and sew around. I like to place the cording inside while stitching -- I never liked doing it afterwards. You can use a zipper foot or move the needle position to the far right.


9) Knot and trim the cord ends. To close, pull the cording from both sides. My cording is really stiff -- a thicker version of those strings/ropes (???) to open and close drapes. To allow for shrinkage, have the knotted end an inch wider than the bag.

All finished :)

Wednesday, October 29, 2008

Scrapbusters (long strips): wristlet keychains


I am physically unable to throw away fabric scraps. If it's over an inch, it goes into storage instead of the trash. What to do...since I'm not a quilter.  There was a huge stack of these strips which were finally made into these simple wristlet keychains (so much nicer than clutching them in your hands). They can also be clipped to a zipper pull to convert a pouch to a wristlet.


Supplies needed:
- 2 x 12 inch fabric strip
- 2 x 12 inch interfacing strip (pellon 50?)
- keychain loop


Fold in half lengthwise and then each half in half. Press if needed and sew long ends together.


String the keychain and bring short ends together. Sew and zigzag ends.


Move keychain to the new seam, flip seam to the inside of the loop. Sew (about 3/4 inch from the edge) to enclose the keychain.

And it's done!

Sunday, September 21, 2008

Tutorial: Zippered top lunch bags


Supplies:
* prewash fabric before cutting
- 2 pieces of outer fabric (12 inches across and 8 inches high)
- 2 pieces denim or contrasting bottom (12 inches across and 6 inches high)
- 2 pieces of lining fabric (13 x 12 inches)
- 4 pieces of interfacing (same dimensions as lining) - I used a layer each of sew-in ultra firm and Insulbright, You can sub with fusible.
- 14 inch zipper (closed or open, it has to be wider than the width of the bag by a couple of inches)
- 24 inches of 1 inch webbing (or make your own straps with 4 x 24 piece of fabric)

- sew the outer fabric pieces together and then top stitch (with the interfacing underneath)


- pin zipper between the top sections of the outer fabric and the lining (with the interfacing/Insulbright), leaving about 1.5 inch non-sewn space on each side. This gap provides room for the shoulder straps to be sewn in later. Repeat for the other side.

- pin lining sides and outer fabric sides together with right sides facing each other (you may need to trim to make it neat and even). Make sure zipper is about 3/4 open. Also, the zipper end needs to be tucked inside. Start from the lining bottom (about 3 inches from the side edge) and go all the way around until you've sewn the matching 3 inches from the opposite side. This creates the opening to turn the bag right side out.

- cut a inch square (not including the seam allowances) at each corner, which creates a flat bottom. You can use the first one as a template for the other corners.

- open up the opening, pin in place and sew seam
.

- turn the bag right side out. You can press (iron or finger) the fabric around the zipper. Pin the shoulder strap in the side gaps, between the outer and lining layers. Make sure the zipper end is behind the strap (towards the center of the bag)

- top stitch all around. I did a mini zig zag (and back stitched several times) on the straps to ensure all layers were sewn together.

- pin the lining opening and sew. If you like to prevent the lining from vomiting out after machine washing, you zig zag one lining bottom side to the seam of the outer layers. Then sew them all together to close. Trim the zipper end if necessary (and add a fabric tab to enclose the end).

All done :)

I hope this is clear. Since switching to a Mac, I'm having a real hard time with loading and moving pictures on my blog posts. If anyone has any ideas please help!

Monday, October 16, 2006

Whiplash Accessories Entry -- A mini wallet tutorial

I've loved the generosity of many in the blogging world for their tutorials, so here is my attempt at one (please bear with my writing style and some of the crappy photos...my sewing machine is literally under a flight of stairs).

This is a basic tutorial for an "envelope" type purse, which can be adapted for many uses.

The first step is to figure out the desired dimensions of the finished product. Then with mental math or a trusty calculator, calculate the fabric size following these guidelines:

width: desired width + 1" seam allowance
height: desired height x 2.5


You will need two pieces (outer and liner) and one of interfacing (cut about 1/2" smaller all around) -- I like using the heavy duty kind.


Putting the right sides together with the interfacing behind, sew around the edges using using 3/8" seam and leaving a 4" opening. Trim the corners for less bulk.


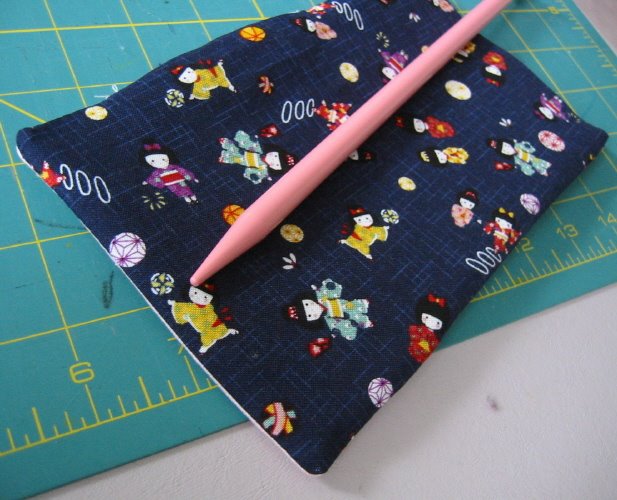
Turn inside out, making sure the corners are nice and square (I like using a big fat knitting needle) and using fingernails or an iron, press.


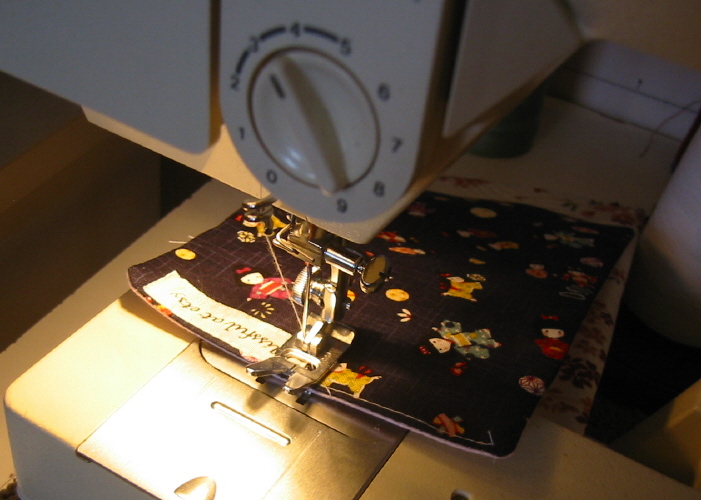
Evaluate which end would make the more attractive flap and then top stitch the opposite end (I usually add a shop label here).

Fold up the bottom edge to the desired height and pin in place. Starting at the bottom corner, top stitch up the side, around the flap and down the other side.


Add a snap closure and it's all done! It's great for a cash, "feminine products", eyeglasses and etc.


This is my official whiplash entry in the tutorial category.

whipup

Tuesday, May 16, 2006

Creating inexpensive fabric labels


It seems there are two ways of creating your own labels -- iron-on transfer (via Grumperina) or laser/ink jet printing (via Soulemama). Choose the iron-on transfer if you wanted more unique ones (to include fiber content, washing instructions, size) or the laser printing for more generic ones (like for handbags).

Taking a cue from SouleMama (and I heard this is a common scrapbooking technique), here is how I make my labels:

1) choose a font , size and page margins until you have the maximum amount in two columns (need to allow room for seam allowances).

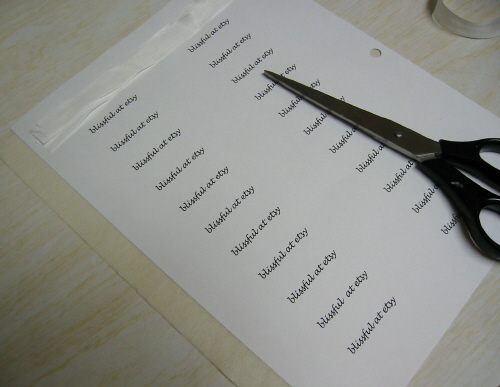
2) print on card stock/tag board (much easier to handle).

3) measure and cut out length of appropriate sized ribbon (I used rayon seam binding because that's what I had). The easiest way was to adhere a strip of masking tape along the edge (see picture) with only half of it behind the paper and the other half over the ribbon (if you're bad at pick-up sticks or Jenga place a coffee mug to hold the ribbon in place). Repeat for the other side. Make sure it lies flat and tight.

4) print and hold breath. Voila, instant labels! Since seam binding unravels a bit, I just leave on the card stock until ready to use. I left enough of a margin on both sides, I could just cut them without having to remove the masking tape.

**** Oops I forgot to add one last instruction...to heat set with an iron (press down first, and then start ironing to prevent smearing). I haven't put them through a machine wash, but it doesn't run when I scrub it in the sink. I used a laser printer, not sure if ink-jet printers are more water proof.